Bar Light Automation
I satisfy my desire to nerd out by programming an ESP32 microcontroller and wiring Hafele bar lights up for home automation.


I recently completed a cool Home Assistant automation with Hafele light strips installed in a built-in bar. Now I can turn my bar lights on and off by voice, app, or any other automation trigger. Think "It's party time!", or "I need a drink," then your bar lights up.
Okay Nabu, turn on bar lights.
We had this bar custom built and installed before moving in and I wasn't really thinking about automation or smart home integration when we chose this specific vendor. They said they had a wireless remote option, and I said, "OK, I can figure that out later."
I'll walk you through the thought process and tell you what I learned along the way.
Starting at the Remote
The trigger for me was reading a blog post from the Open Home Foundation about having radio frequency proxies to automate all sorts of devices that don't speak modern protocols.
Can I use the RF proxy in Home Assistant with ESP32 to control the bar lights? I wondered?
Well, I did some Googling and asking Claude, and this isn't RF, It's Bluetooth Mesh. Sadly I can't use BLE directly, and one option would be to get the custom Hafele controller. Or adopt a DIY Raspberry Pi-based Bluetooth Mesh controller and export the encryption keys from my existing system. This seemed like a lot of work, running a whole new server to automate the lights in one piece of furniture.
Here's what the Bluetooth Remote looks like when you take the cover off:
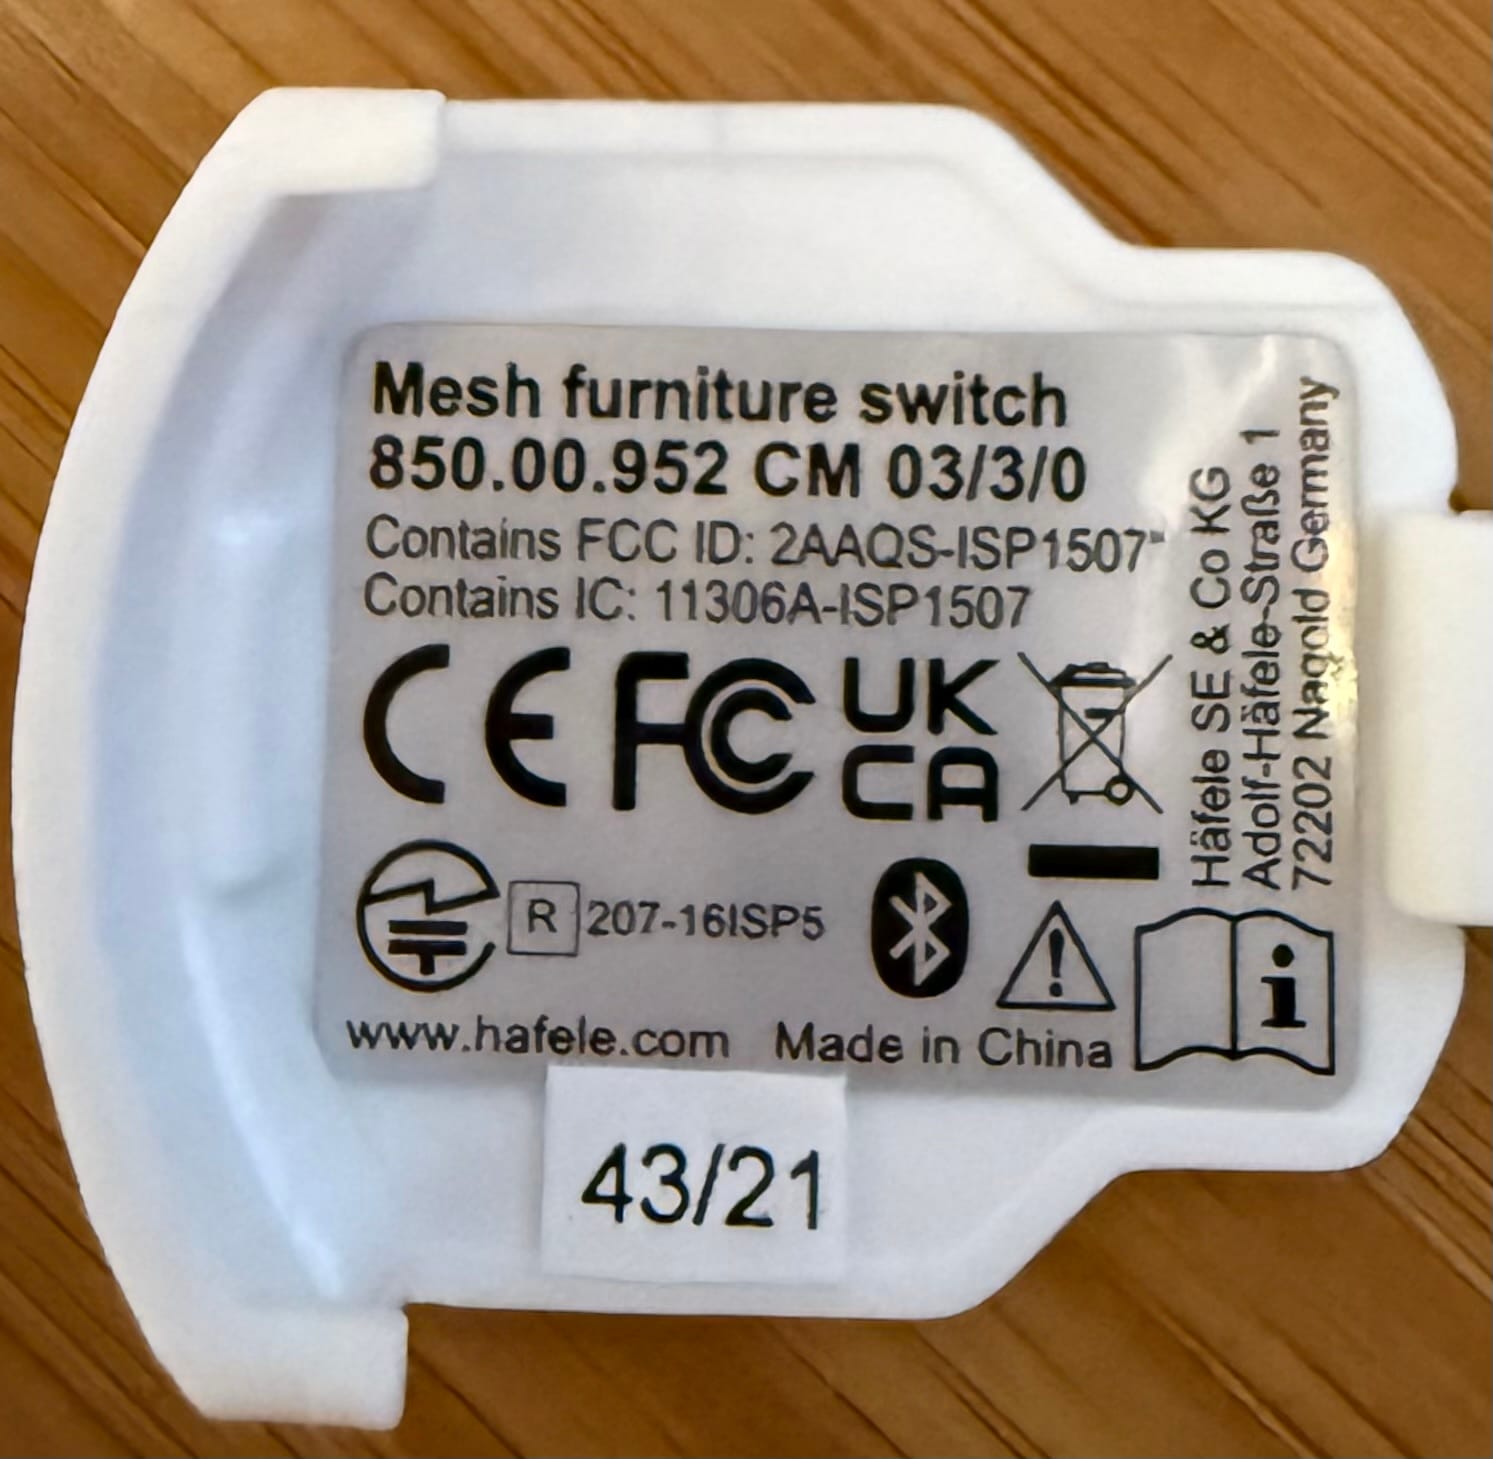
Here are the details that started my search
Mesh furniture switch
850.00.952 CM 03/3/0
Contains FCC ID: 2AAQS-ISP 1507
Contains IC: 11306A-ISP1507
Häfele SE & Co KG
The Controller
After realizing the remote spoke Bluetooth Mesh, I knew that there were some brains buried in here somewhere. I pulled open a drawer and saw a power supply slash driver screwed to the back wall, and then a smart distributor with 6 connections running away from it. One connection for each individual light strip in the bar.
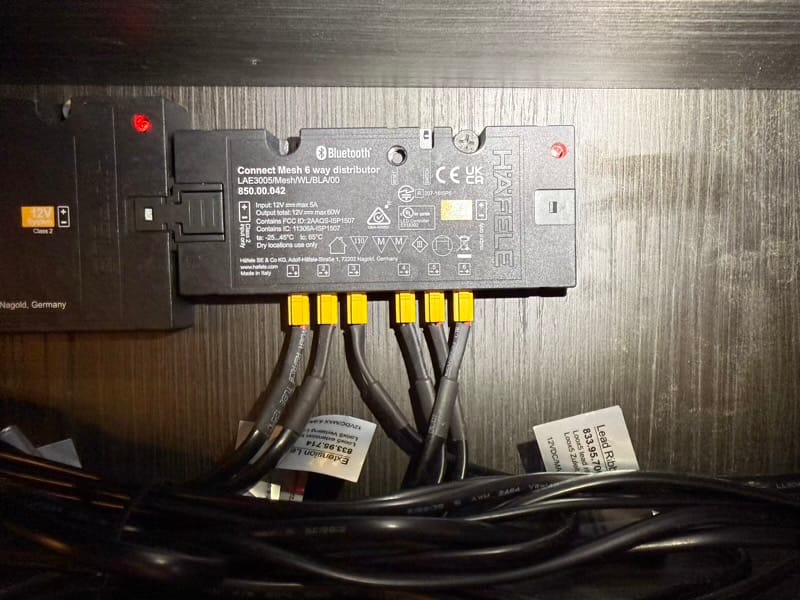
Here were the specs on the controller.
Mesh Light Controller
850.00.42 connected mesh 6 way distributor
The Breakthrough
I started to dig through the manuals for the reset procedures. This smart controller could be controlled from an app on my phone, but I had no idea how the installer set this up originally or how to add it to my phone.
Looking through the manuals online based on the part numbers, I found out that an 8-second hold would reset the smart controller, and the smart switch, and then I could:
- Add these devices to my account in the Connect Mesh app.
- Export the keys from Connect Mesh if I wanted to go down the DIY mesh controller route.
The breakthrough was in the spec sheet and the tiny print on the distributor that said "Switch."
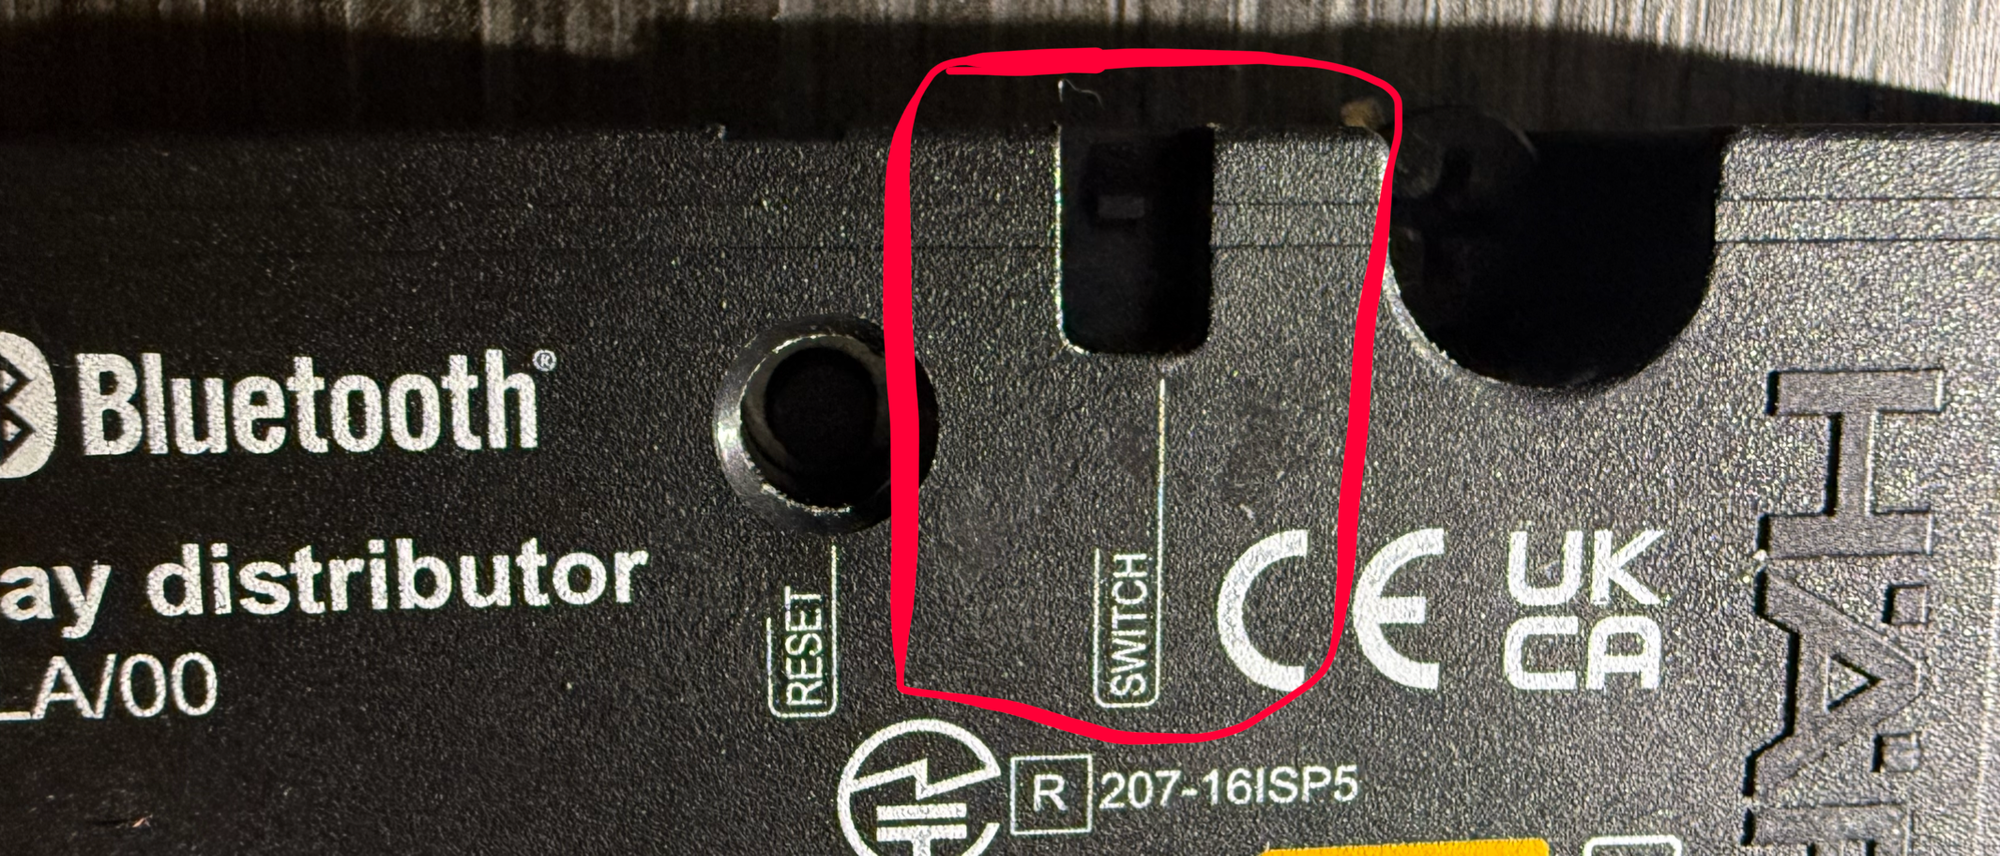
I looked at the Hafele parts catalog and indeed there were a range of switches you could plug into this port. Some of them are powered and seemed like they required smart signaling for motion detection. However, they also had a range of door contact or door open sensors that looked like simple two-wire contact switches.
The simpler automation idea was born: Could I just short two wires together and get the lights to turn on and off?
No mucking with keys and protocol integration with some vendor proprietary system. Just a relay that opens and closes on command.
ESP Home Approach
ESP Home is the perfect fit for this solution. There are tons of ESP Home compatible devices that are low-cost, quick to setup, and integrate into Home Assistant without much coding needed.
My idea was to flash some ESP32-based chip with a relay configured as a switch, and wire into the sensor port where other switches plug in to the Hafele distributor. The ESP Home device can be powered with a cheap USB-A to USB-C phone charger. It'll register on my home wifi and show up as a smart switch in Home Assistant.
Switch Parts and Validation
The first thing I needed was a snap-in lead. This is the part that connects to the 4-pin port on the distributor. I got this from CabinetParts.com and it was relatively inexpensive and delivered quickly.
Häfele Loox Snap-in Lead 500mm - #833.89.140 (~$7)
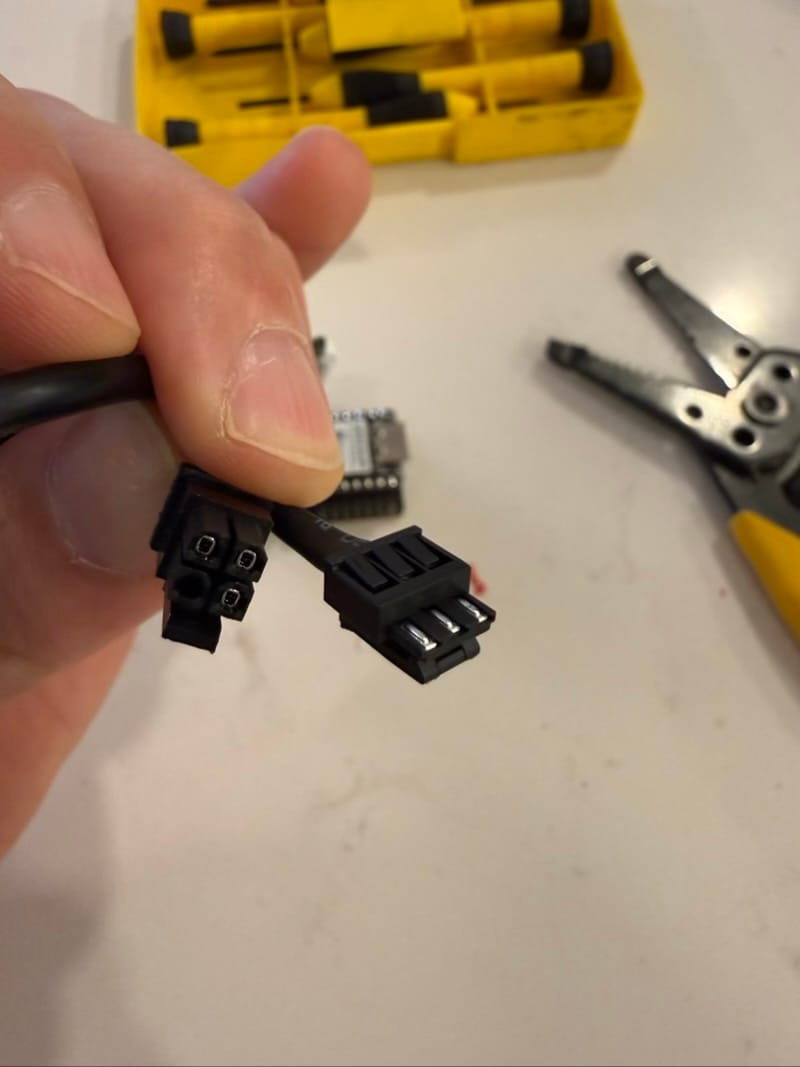
I also wanted to check that a normal switch works like I expect. Before I went down the smart home automation route buying microcontrollers, let's validate my assumption that the switch even works! That port has 4 wires and I don't know what they're all for. If I can learn how a two-wire switch works, I can wire up something to imitate that and reduce the risk of frying some expensive Hafele parts.
Hafele Loox LED Modular Universal Door Contact Switch - 833.89.059 (~$10)
My switch parts arrived and I unplugged the power from the distributor, plugged the simple door switch in, and.... NOTHING. The new switch didn't work whether the bar lights were on or off.
This was disheartening.
So, I thought "Well, this is a smart distributor, maybe it needs some configuration?"
I hopped into my newly created Connect Mesh network and looked at the Bar Light distributor I created. There was something in there called "Sensor." The manual had called the switch port a "Sensor Port" and this Sensor Port was not configured. I enabled the Sensor Port and named it "Bar Switch" and just like that my simple door activation switch started working.
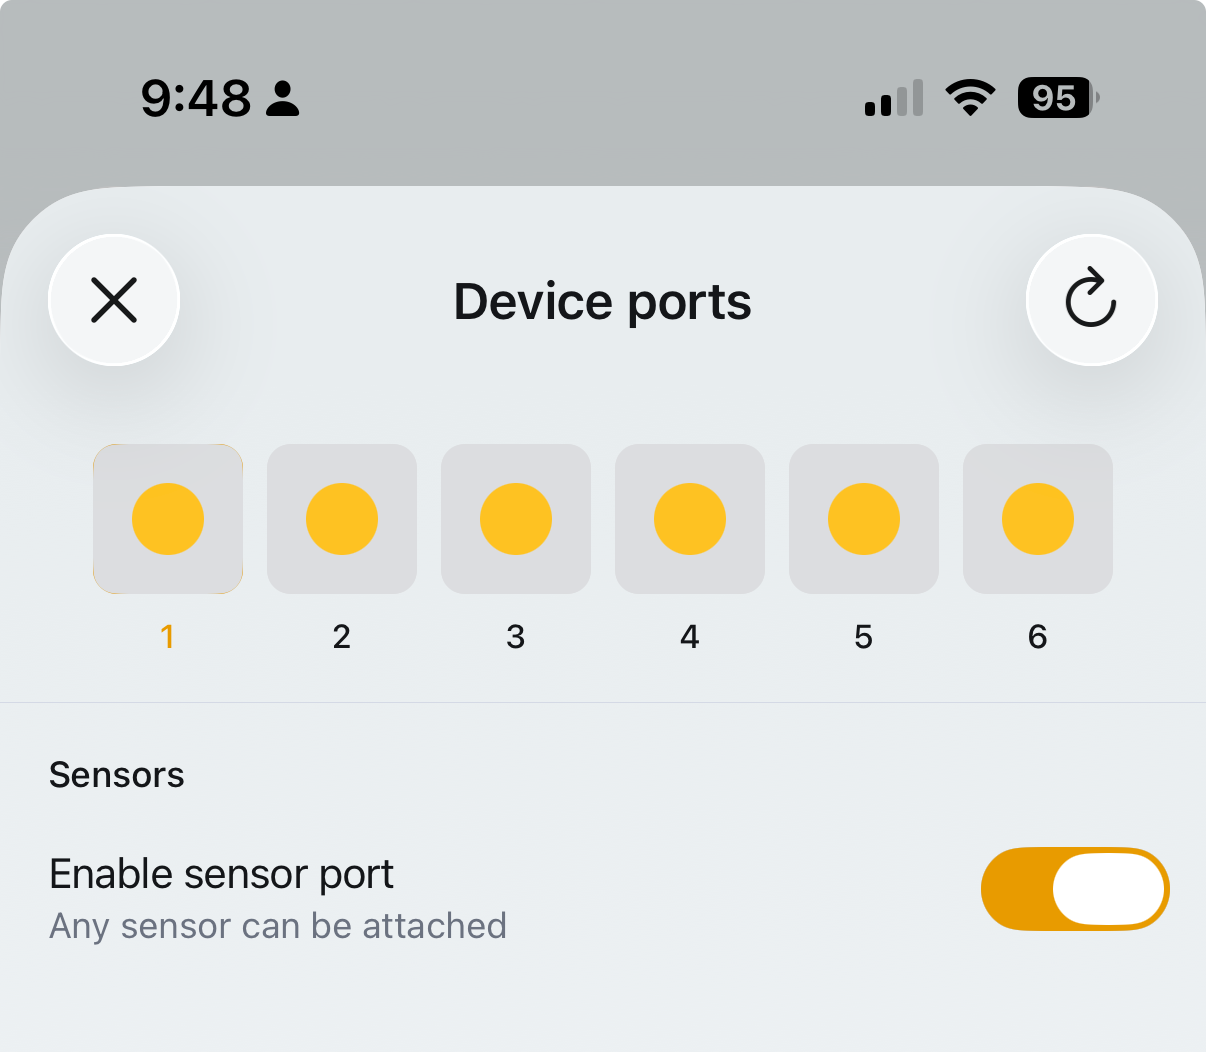
I'm really glad I did that before wiring up or purchasing the microcontroller pieces!
The next part was figuring out how to electrically connect that switch.
I cut the far end of the snap-in lead off and was left with three wires, red, black, white.
I looked at the working two wire switch and saw it was connected where the red and white pins connect.
I tested between the red and white pins with my multimeter and got 12 volts regardless of whether the lights were on or off.
I knew that these were very likely the switched wire pair and I wanted to short them together. I was lazy and didn't have a jumper wire, so I put my multimeter in resistance / continuity mode. How much current could go through the switch, I thought. Probably not much.
Luckily I was right, but I was still surprised at the result.
When I shorted the red and white wires together, the light turned off. When I removed the probes, the light turned on.
For a door contact sensor I suppose this makes sense. The door is closed most of the time which would have force to close the contact and make a connection. When the door opens, the spring pops open and the contact also opens.
It wasn't what I expected, but I can still make it work.
Microcontroller Parts
I decided to go with the ESP32-C6. It's way overkill for this project, but SeeedStudio has the Xiao lineup that's small, affordable, and has simple plug and play add-ons. As part of the move downtown I lost my workshop and soldering station, so having chips that snap together was going to be handy. I know it's more horsepower than I need to run a relay, but if the project doesn't work out or I want to repurpose it for something else, I have options.
SeeedStudio Xiao ESP32-C6 Pre-Soldered (~$7)
There is a 1-wire relay that accepts the pin headers on the ESP32. It just snaps together!
SeeedStudio 1-wire relay add-on module for Xiao (~$5)
I already had an old USB phone charger and USB-A to C cable, so we'll call those parts (~Free).
To save on shipping I ordered two of the C6s, two relays, and in prep for another project a little LED clock display and DHT22 temperature and humidity sensor. But that's for another blog!
Programming
Programming this device in ESP Home Builder was pretty straightforward in my existing Home Assistant. I selected the board, configured my WiFi, and selected the relay. Importantly, I had to invert the relay from normal operation. Remember that open contact is on, and closed contact is off. The reverse of what I'd expect. Inverting the relay handles this, so my switch On/Off in Home Assistant will reflect the relay On/Off status.
Once you save and validate the config in your browser, you're ready to flash the firmware to the device plugged into your computer.
I had to take a few unique actions to get this going:
- Install Chromium on my Linux laptop
- Add my user to the
dialoutgroup, log out, and log back in - Remove the relay chip from the ESP32, because it had complained about a pin being in use and to remove any connected devices.
Once I got through THOSE challenges, I held down the TINY boot button on the device while plugging the USB cable into my computer.
I verified with sudo dmesg -w that the device connected and stayed connected.
Then you can head over to the ESP Home Builder web interface and Install to a device connected to this computer. The first compile took a few minutes, but subsequent compiles happened faster.
The device flashed. I unplugged it, plugged the relay back into it, then powered it back on. I could see it join my network and show up in Home Assistant.
I clicked the On / Off toggle in Home Assistant and heard the magic little click of the relay. Success. I was on my way!
Wiring
The wiring was pretty straightforward. I took the red and white wires of the already cut snap-in lead, stripped a small bit off, and screwed them into the terminals of my relay. I taped up the black wire off to the side.
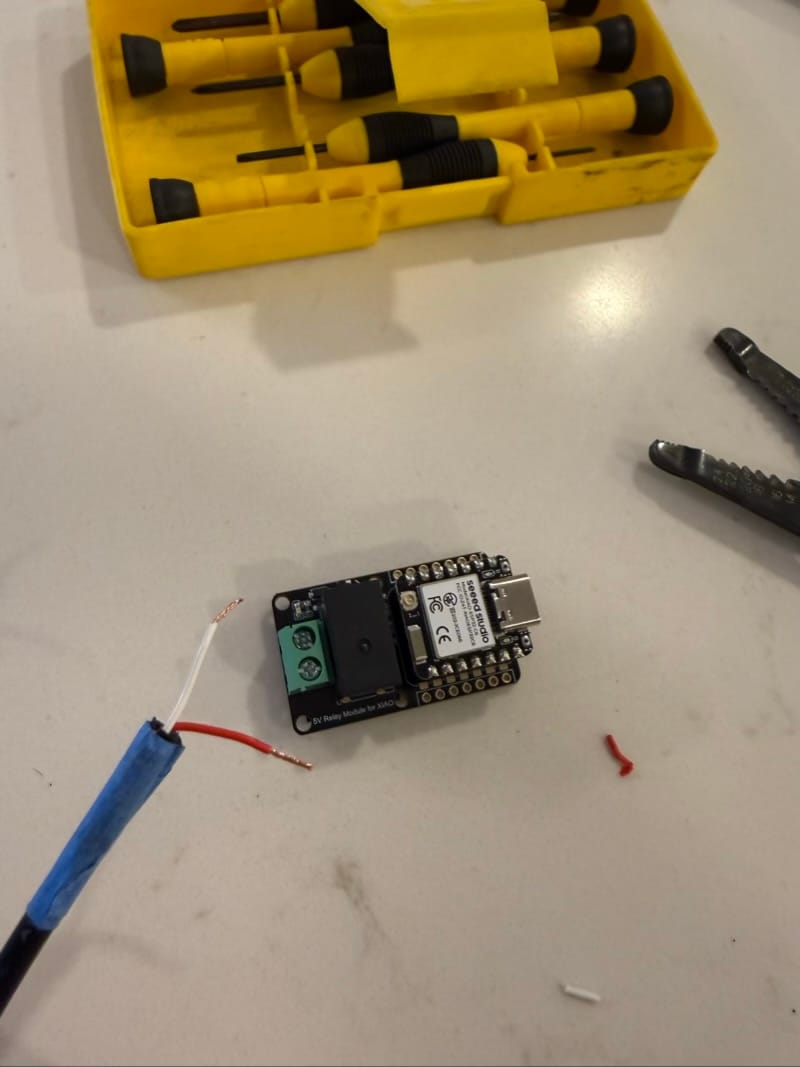
I ran a USB cable from the power outlet into the dead space behind the drawer, then plugged everything back together.
Here's a picture of everything.
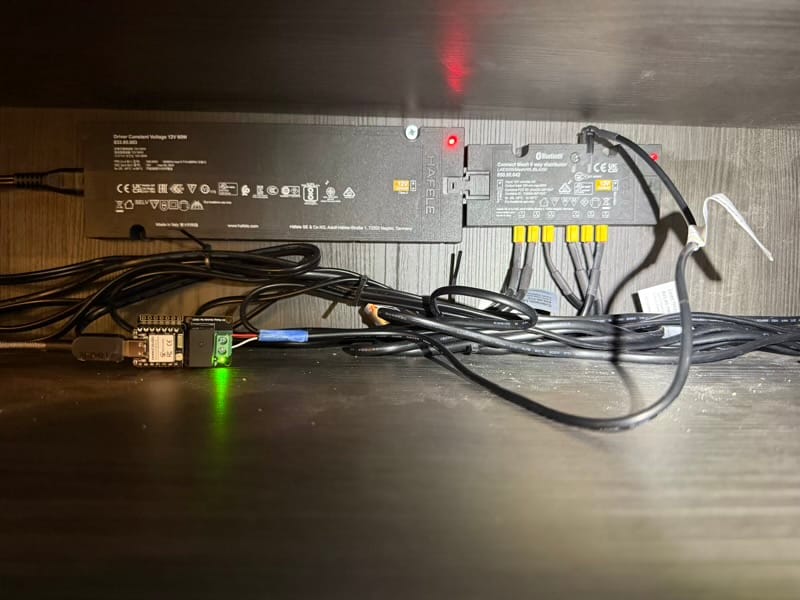
I'm still waiting on the 3d printed enclosure. I have to submit the print job to the library queue.
The Result
Now when I say "Turn on bar lights" the lights turn on! Just like the video at the top of this post.
A small thing, but now I can automate these lights into the central smart home component of Home Assistant. That opens up all sorts of automation possibilities. I'll never have to think about: "Where is that little bluetooth remote?"
Even better, I have a Z-Wave switch underneath the bar that controls the dining lights. I programmed "double tap on" to turn on the bar lights, and "double tap off" to turn off the bar lights. Single tap in either direction controls the dining light, and double tap controls the bar right next to it. Now I never need to worry about that little remote again!